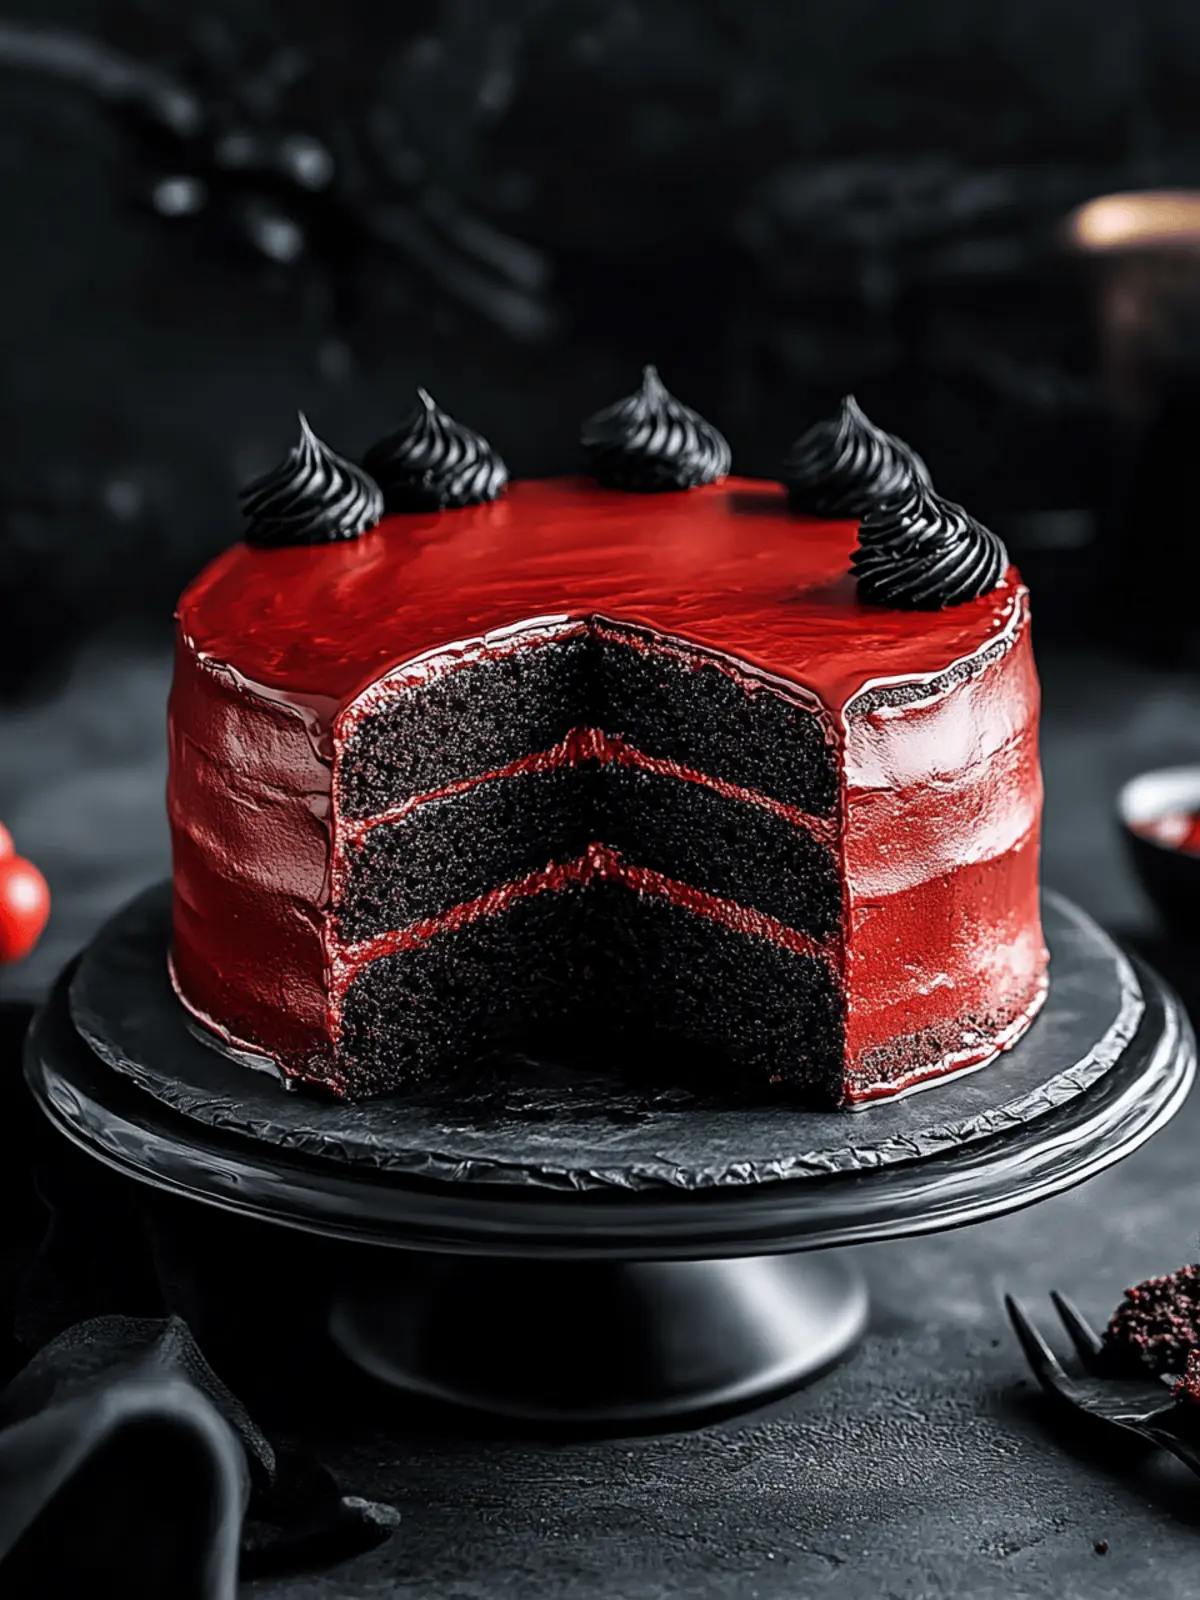
As the leaves turn crimson and the air grows crisp, I find myself yearning for a dessert that embodies the spirit of the season. Enter the Black Velvet Cake, a visually stunning treat that adds a touch of drama to any Halloween gathering. This cake boasts a rich chocolate flavor, complemented by a striking blood-red icing that not only tantalizes the eye but also the taste buds.
I first discovered this gem during a spontaneous baking session one rainy afternoon. In a matter of minutes, my kitchen transformed into a deliciously creative space, and as I layered the rich cake with its vibrant icing, excitement bubbled within me. The result? A moist, decadent cake that would make an impressive centerpiece for any festive celebration.
Whether you’re looking to impress guests or simply indulge in a slice of homemade delight, this Black Velvet Cake is ready to steal the show. Let’s dive into the recipe and create something truly unforgettable!
Why is Black Velvet Cake so irresistible?
Decadent layers come together to create a dessert that’s nothing short of spectacular. Rich chocolate flavor shines through, making every bite a delight. Gorgeous presentation with its striking red icing makes it a showstopper at any gathering. Flexible preparation allows for easy swaps, like gluten-free options or different fillings. Quick and straightforward to make, it’s perfect for both seasoned bakers and beginners alike. Plus, it’s sure to impress your guests with its stunning look and delicious taste!
Black Velvet Cake Ingredients
• Dive into baking with these essential ingredients for the perfect Black Velvet Cake.
-
For the Cake
-
All-purpose flour – Provides the structure; cake flour can be used for a lighter texture.
-
Sugar – Sweetens the cake; substitute with coconut sugar for a lower GI option.
-
Unsweetened cocoa powder – Adds richness and color; using dark cocoa intensifies the flavor.
-
Baking soda – Serves as a leavening agent; make sure it’s fresh for the best rise.
-
Baking powder – Works in tandem with baking soda for extra lift.
-
Salt – Enhances the flavor of the cake.
-
Large eggs – Acts as a binding agent and adds moisture; use flax eggs for a vegan twist.
-
Buttermilk – Contributes to moisture and tenderness; yogurt thinned with milk is a good substitute.
-
Vegetable oil – Keeps the cake moist; melted coconut oil adds a unique flavor.
-
Vanilla extract – Boosts the flavor; pure extract yields the best results.
-
Boiling water – Hydrates and activates the cocoa; don’t skip this step for a rich texture.
-
Black gel food coloring – Achieves a deep black hue; gel is essential for vibrant results.
-
For the Icing
-
Unsalted butter – Adds creaminess to the icing; always use softened butter for easy mixing.
-
Powdered sugar – Provides sweetness and structure; sift it for a smoother icing.
-
Heavy cream – Lightens the icing and adds richness; adjust to your desired consistency.
-
Red gel food coloring – Gives the icing its striking color; choose gel to maintain the structure.
These ingredients come together to create a visually stunning Black Velvet Cake that will be the talk of your Halloween gathering!
How to Make Black Velvet Cake
-
Preheat the oven to 350°F (175°C) and grease two 9-inch round cake pans. This ensures your cakes will slide right out after baking, making assembly a breeze!
-
Sift together flour, sugar, cocoa powder, baking soda, baking powder, and salt in a mixing bowl. This step incorporates air, ensuring a light and fluffy cake.
-
Whisk the eggs, buttermilk, vegetable oil, and vanilla extract in another bowl until smooth. The combination of these wet ingredients adds moisture and richness to the cake.
-
Combine the wet and dry mixtures gradually, then mix in the boiling water until you’ve achieved a thin, uniform batter. This crucial step activates the cocoa, enhancing its flavor.
-
Add black gel food coloring to the batter gradually, mixing until the desired hue is reached. Divide the vibrant mixture evenly into the prepared pans and smooth the tops.
-
Bake for 30-35 minutes or until a toothpick inserted in the center comes out clean. This step is vital for that perfect moist texture in your cake.
-
Cool the cakes in the pans for 10 minutes, then transfer them to wire racks to cool completely. Cooling allows for easier icing and prevents melting.
-
Beat the softened butter in a mixing bowl until creamy. Gradually add powdered sugar, heavy cream, and vanilla, continuing to beat until fluffy and smooth.
-
Color the icing with red gel food coloring, mixing to achieve your preferred shade of eye-catching red. Adjust the amount based on how bold you want the color!
-
Assemble the cake by layering with icing between each layer and frosting the sides and top generously. A beautiful finish is key to showcasing your masterpiece!
Optional: Add spooky edible decorations for a festive flair!
Exact quantities are listed in the recipe card below.

Expert Tips for Black Velvet Cake
-
Boiling Water Importance: Don’t skip the boiling water step; it’s essential for achieving the perfect consistency in your Black Velvet Cake batter.
-
Quality Ingredients: Use high-quality cocoa powder and gel food coloring for optimal flavor and striking appearance, elevating your cake’s overall wow factor.
-
Room Temperature Essentials: Ensure all your ingredients are at room temperature for better emulsification, resulting in a smoother batter that bakes evenly.
-
Cake Pan Prep: Grease your cake pans generously and use parchment paper for easy removal after baking. This step prevents sticking, keeping your beautifully shaped cakes intact.
-
Cooling Time: Allow the cakes to cool completely before icing; this prevents melting and ensures your icing stays beautifully intact for a stunning presentation.
What to Serve with Black Velvet Cake?
Indulging in the allure of this rich and visually striking dessert can be made even more delightful with the right accompaniments.
- Vanilla Ice Cream: A classic pairing that adds creaminess and balances the intense chocolate flavor, bringing a comforting warmth to each bite.
- Whipped Cream: Light and airy, it complements the cake’s density while enhancing the overall sweetness and presentation. A fluffy dollop on top is always a crowd-pleaser.
- Berries Medley: Fresh strawberries or raspberries provide a tart contrast and a vibrant color pop, creating a beautiful visual and flavor harmony against the rich black cake.
- Dark Chocolate Ganache: For an extra indulgent twist, drizzle warm ganache on top, intensifying the chocolate experience and adding a glossy finish that partners beautifully with the cake.
- Coffee or Espresso: A warm cup of brewed coffee enhances the chocolate flavor, creating a cozy ambiance while cutting through sweetness with its subtle bitterness.
- Spicy Hot Chocolate: A warm, spiced drink pairs perfectly with the cake, its rich chocolate flavor complemented by hints of cinnamon or chili, adding an exciting layer of taste.
- Coconut Cream: For a tropical twist, serve with a dollop of coconut cream that adds a subtle sweetness and a creamy texture, offering a different kind of indulgence.
- Caramel Sauce: Drizzling caramel over your slice provides an addictive sweetness and creates an inviting, textured finish, turning your dessert into a fabulous culinary delight.
Make Ahead Options
These Black Velvet Cake preparations are perfect for busy home cooks looking to save time without sacrificing flavor! You can prepare the cake layers up to 24 hours in advance; simply bake, cool, and wrap each layer tightly in plastic wrap before refrigerating to maintain their moisture. The icing can also be made ahead and stored in the fridge for up to 3 days—just be sure to re-whip it briefly before using to restore its fluffy texture. When you’re ready to serve, layer the chilled cake with the icing, and you’ll have an impressive dessert that’s just as delicious as if it were freshly baked!
Storage Tips for Black Velvet Cake
-
Room Temperature: Store in an airtight container for up to 3 days. Keeping it covered helps maintain moisture and flavor. Enjoy a slice whenever the craving strikes!
-
Fridge: If you need to keep it longer, refrigerate for up to a week in a sealed container. This keeps the cake fresh and tasty, although it may slightly firm up.
-
Freezer: Wrap the cake tightly in plastic wrap and then foil to prevent freezer burn, allowing it to be frozen for up to 3 months. Let it thaw in the fridge overnight before serving.
-
Reheating: If you’d like to warm up a slice, pop it in the microwave for about 10-15 seconds to enjoy the melty goodness of your delicious Black Velvet Cake.
Black Velvet Cake Variations
Discover the endless possibilities to personalize your Black Velvet Cake with exciting variations that will leave your guests amazed.
- Gluten-Free: Substitute all-purpose flour with a gluten-free blend for a safe alternative that retains delicious flavor.
- Vegan: Swap eggs for flax eggs and buttermilk for a vegan yogurt mixture for a cake everyone can enjoy.
- Fruit-Filled Layers: Add a layer of raspberry or cherry filling between the cake layers for a burst of tangy sweetness.
- Spicy Kick: Incorporate a teaspoon of cayenne pepper into the batter for a daring flavor twist that plays against the sweetness.
- Nutty Crunch: Fold in chopped walnuts or pecans into the batter to introduce a delightful crunch and added richness.
- Chocolate Ganache: Pour a silky chocolate ganache over the iced cake for an extra decadent layering of chocolate.
- Topping Twist: Instead of red icing, top with whipped cream and fresh strawberries for a lighter, fruity flair.
- Themed Decor: Embrace the Halloween spirit by decorating with edible spiderwebs or gummy candies for a festive touch that delights kids and adults alike!

Black Velvet Cake Recipe FAQs
What type of flour should I use for Black Velvet Cake?
I recommend using all-purpose flour for structure, but you can also opt for cake flour if you’re aiming for a lighter crumb. It’s a simple swap that can elevate your cake’s texture!
How long can I store Black Velvet Cake?
You can store Black Velvet Cake in an airtight container at room temperature for up to 3 days, or refrigerate it for up to a week. Keeping it sealed helps maintain its moisture and flavor, so you can enjoy delicious slices for days to come!
Can I freeze Black Velvet Cake?
Absolutely! To freeze, wrap the cake tightly in plastic wrap, then in aluminum foil to prevent freezer burn. It can be frozen for up to 3 months. When you’re ready to savor a slice, simply let it thaw in the refrigerator overnight before serving.
What should I do if my Black Velvet Cake isn’t rising properly?
Make sure your baking soda and baking powder are fresh; expired leavening agents can lead to dense cakes. Also, ensure you’re combining the wet and dry ingredients thoroughly, and don’t skip the boiling water in the recipe — it’s essential for activating the cocoa and helps to create that fluffy texture!
Can I make this cake gluten-free?
Yes! You can make this Black Velvet Cake gluten-free by substituting all-purpose flour with a gluten-free flour blend. Just ensure the blend contains a binding agent, like xanthan gum, for better structure and texture.
Is this recipe safe for pets?
While your furry friends might be curious about your delicious creation, keep in mind that chocolate is toxic to dogs and cats. To keep them safe, it’s best to keep your cake out of their reach and treat them to pet-safe treats instead!
Black Velvet Cake Recipe FAQs

Decadent Black Velvet Cake with Fiery Red Icing Delight
Ingredients
Equipment
Method
- Preheat the oven to 350°F (175°C) and grease two 9-inch round cake pans.
- Sift together flour, sugar, cocoa powder, baking soda, baking powder, and salt in a mixing bowl.
- Whisk the eggs, buttermilk, vegetable oil, and vanilla extract in another bowl until smooth.
- Combine the wet and dry mixtures gradually, then mix in the boiling water until a thin batter forms.
- Add black gel food coloring to the batter gradually, mixing until the desired hue is reached.
- Divide the batter evenly into the prepared pans and smooth the tops.
- Bake for 30-35 minutes or until a toothpick inserted comes out clean.
- Cool the cakes in the pans for 10 minutes, then transfer them to wire racks to cool completely.
- Beat the softened butter in a mixing bowl until creamy and gradually add powdered sugar, heavy cream, and vanilla.
- Color the icing with red gel food coloring to achieve your desired shade.
- Assemble the cake by layering with icing between each layer and frosting the sides and top generously.


