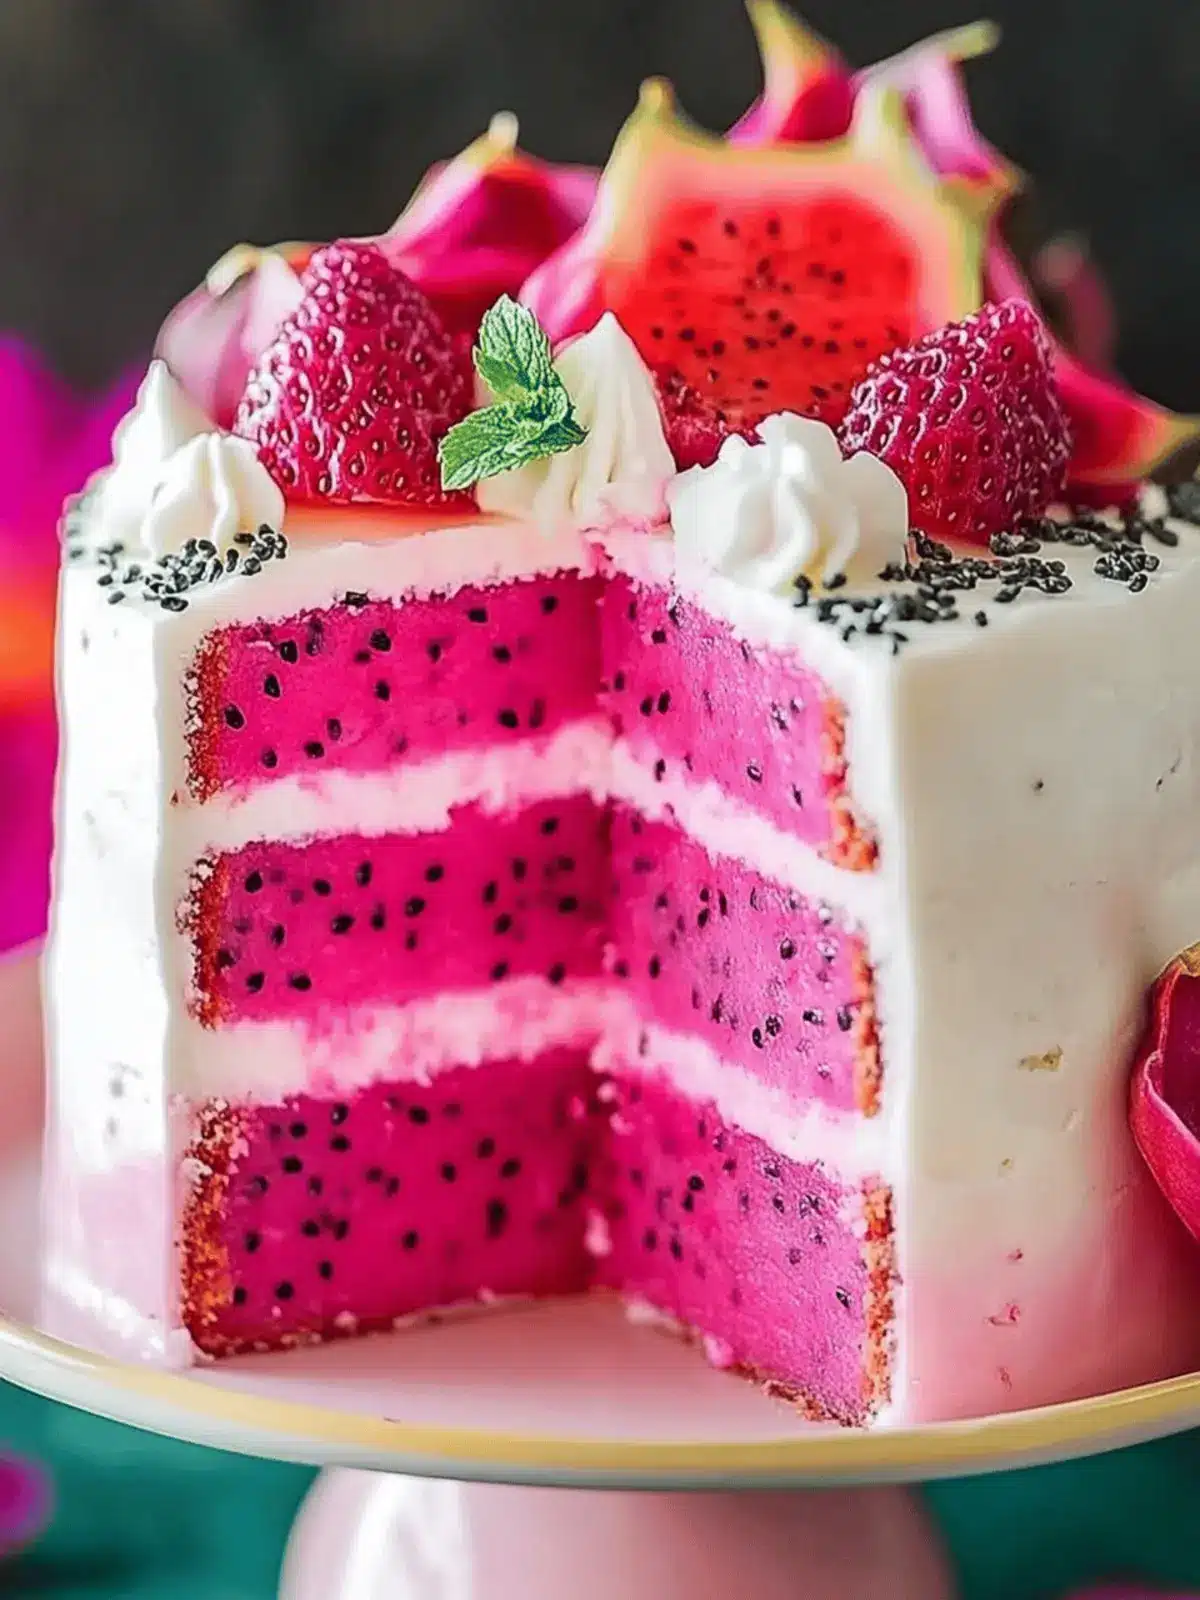
There’s something undeniably captivating about the vibrant pink hue of dragon fruit, and when combined in a cake, it transforms ordinary baking into an extraordinary experience. As I stood in my kitchen, blending the smooth, luscious texture of the fruit with my batter, it felt like a mini celebration in itself. This Pink Dragon Fruit Layer Cake not only dazzles the eyes with its stunning color but also delights the taste buds with a moist and subtly sweet flavor.
Perfect for any occasion—from birthdays to casual summer gatherings—this cake is as beginner-friendly as it is impressive. Even better, there’s a gluten-free option, ensuring that everyone can indulge. Imagine serving a slice topped with creamy frosting, bursting with fruity goodness, and watching your friends and family marvel at its beauty and taste. Get ready to add a splash of color and a burst of flavor to your dessert table!
Why is Pink Dragon Fruit Layer Cake a must-try?
Vibrant Color: The eye-catching pink hue instantly elevates any dessert table and adds a fun pop to celebrations.
Beginner-Friendly: Perfect for novice bakers, this recipe simplifies the process without sacrificing taste or visual appeal.
Gluten-Free Option: Easily swap out the flour for a gluten-free blend, making it accessible for everyone!
Versatile Flavor: Delight in the subtle sweetness of dragon fruit, or switch it up with other fruits for a unique twist.
Impressive Texture: Moist, fluffy layers combined with smooth frosting create a delightful cake experience everyone will love.
Each slice of this cake promises to be a delicious treat that’s perfect for gathering friends and family—why not bake one today?
Pink Dragon Fruit Layer Cake Ingredients
For the Cake
• All-Purpose Flour – Provides structure; substitute with gluten-free baking mix for a gluten-free version.
• Granulated Sugar – Adds sweetness; adjust according to your taste preferences.
• Butter – Contributes moisture and richness; use unsalted to control the salt level.
• Eggs – Essential for structure and leavening; flax eggs can be used for a vegan alternative.
• Vanilla Extract – Enhances the overall flavor profile of the cake.
• Dragon Fruit (fresh or frozen) – Infuses the cake with fruity flavor and vibrant color; ensure frozen fruit is thawed and patted dry before use.
• Milk – Adds moisture; consider plant-based milk for a dairy-free option.
For the Frosting
• Heavy Cream – Creates the perfect frosting texture; adjust the amount for desired consistency.
• Dragon Fruit Puree – Adds bright flavor to the frosting; use fresh or thawed fruit.
• Granulated Sugar – Sweetens the frosting; add more or less according to your taste.
Dive into this stunning Pink Dragon Fruit Layer Cake and impress your loved ones with its beauty and delectable flavor!
How to Make Pink Dragon Fruit Layer Cake
-
Prep Tools & Ingredients: Begin by gathering all necessary tools like mixing bowls, measuring cups, cake pans, and a mixer. Having everything on hand makes the process smoother and more enjoyable!
-
Mix Dry Ingredients: In a large mixing bowl, whisk together the all-purpose flour, granulated sugar, and any other dry flavorings you desire. This step sets the foundation for a deliciously balanced cake.
-
Cream Butter & Sugar: In a separate bowl, beat the unsalted butter and sugar until light and fluffy. This should take about 3-5 minutes and creates a delightful base full of air and sweetness.
-
Add Eggs & Vanilla: Incorporate the eggs one at a time, blending well after each addition. Don’t forget to add the vanilla extract; it enhances the sweetness and rounds out the flavor beautifully!
-
Incorporate Dragon Fruit & Milk: Gently fold in the pureed dragon fruit and milk into the batter until just combined. Make sure to maintain as much air as possible for a light texture.
-
Bake the Cakes: Divide the batter evenly between prepared cake pans and bake in a preheated oven at 350°F for 20-25 minutes. Check doneness with a toothpick; it should come out clean when the cakes are ready!
-
Make the Frosting: While the cakes cool, whip the heavy cream with dragon fruit puree until smooth. Gradually add sugar, tasting as you go to achieve your desired sweetness.
-
Assemble the Cake: Once the cakes are completely cool, layer them with frosting in between each cake. This creates a beautiful contrast and keeps the cake moist.
-
Decorate: Finish your masterpiece with additional frosting on top and some fresh fruit toppings for an extra burst of color and flavor!
Optional: Garnish with mint leaves for a refreshing touch!
Exact quantities are listed in the recipe card below.
Pink Dragon Fruit Layer Cake Variations
Feel free to indulge your creativity with this delightful cake by adding your own unique twists!
- Gluten-Free: Substitute all-purpose flour with a gluten-free baking mix to cater to gluten-sensitive friends and family.
- Vegan: Swap eggs with flax eggs and use plant-based butter and milk for a delicious vegan treat that everyone will love.
- Berry Boost: Replace dragon fruit with fresh raspberries or strawberries for a tangy twist that perfectly complements the sweetness!
- Citrus Zest: Add a teaspoon of lemon or lime zest to the batter for a refreshing citrus burst that brightens the overall flavor.
- Coconut Cream: Substitute heavy cream with whipped coconut cream for a tropical vibe that enhances the fruity notes in the cake.
- Nuts for Crunch: Fold in chopped nuts like almonds or walnuts into the batter for extra texture and a delightful crunch that elevates each bite.
- Chocolate Infusion: Swirl in some melted dark chocolate to the batter for a rich, decadent layer that pairs wonderfully with the fruity frosting.
- Spiced Touch: Incorporate a dash of cinnamon or cardamom into the batter for a warm, inviting aroma that surprises and delights.
With these variations, you can personalize your Pink Dragon Fruit Layer Cake to suit any occasion!
What to Serve with Pink Dragon Fruit Layer Cake?
Delight your guests with the vibrant experience this cake brings, making any gathering a memorable feast.
-
Fresh Berries: The acidity of strawberries, blueberries, or raspberries beautifully complements the sweetness of the cake, enhancing its fruity notes. Scatter some on the plate for a colorful touch.
-
Coconut Sorbet: This light, icy flavor pairs perfectly with the moist cake, creating a cool contrast that refreshes the palate between bites. Each spoonful enhances the tropical feel of the dessert.
-
Lemonade: A tall glass of zesty lemonade brings a bright and refreshing balance to the sweetness of the cake, making it a delightful match for an outdoor summer gathering.
-
Whipped Cream: Lightly sweetened whipped cream adds a luxurious creaminess that elevates each slice. Consider adding a hint of vanilla or a sprinkle of toasted coconut for an added flavor layer.
-
Mint Leaves: Garnish the cake slices with fresh mint leaves for a pop of color and a refreshing herbaceous twist, enhancing the overall eating experience with its aromatic fragrance.
-
Chocolate Drizzle: A rich chocolate sauce can cover the cake with a decadent layer, creating a rich contrast that pairs wonderfully with the fruity sweetness of dragon fruit.
-
Almond Milk: For a cozy beverage option, serve chilled almond milk alongside slices of cake. Its nuttiness complements the cake’s flavors without overpowering them.
-
Pistachio Nuts: These crunchy, salty nuts provide an exciting textural contrast to the fluffy layers of cake while their subtle flavor enhances the overall dessert experience. Scatter them on top for an elegant finish.
With these pairings, your Pink Dragon Fruit Layer Cake will shine even brighter at your next celebration!
How to Store and Freeze Pink Dragon Fruit Layer Cake
Fridge: Store your cake in an airtight container in the refrigerator for up to 3 days to maintain its moist texture and delicious flavor.
Freezer: If you’d like to keep your Pink Dragon Fruit Layer Cake longer, wrap it securely in plastic wrap and aluminum foil before placing it in the freezer. It can last for up to 3 months!
Reheating: When you’re ready to enjoy, thaw the cake in the fridge overnight, then bring it to room temperature before serving for the best taste.
Frosting Care: If frosted, store the cake in the fridge. Before serving, let it sit out for about 30 minutes to soften the frosting slightly for a creamy experience.
Make Ahead Options
These Pink Dragon Fruit Layer Cakes are perfect for busy home cooks looking to streamline dessert preparation! You can bake the cake layers up to 24 hours in advance; simply wrap them tightly in plastic wrap once cooled to maintain moisture. The frosting can also be prepared ahead of time and stored in the refrigerator for up to 3 days—just give it a quick whip before using to restore its fluffy texture. When you’re ready to serve, layer the cakes with frosting and garnish as desired for a beautiful presentation. By prepping in advance, you’ll save time on the big day while still enjoying the fresh flavors of this delightful cake!
Expert Tips for Pink Dragon Fruit Layer Cake
-
Room Temperature Eggs: Ensure your eggs are at room temperature; this helps them mix evenly, resulting in a lighter cake texture.
-
Smooth Frosting: For a velvety frosting, add the heavy cream gradually while whipping. This prevents lumps and creates a fluffy consistency.
-
Check Cake Doneness: If baking in one large pan, increase baking time to 40-45 minutes. Keep an eye on it and test with a toothpick to avoid underbaking.
-
Frozen Fruit Care: When using frozen dragon fruit, allow it to thaw completely and drain excess moisture to prevent a soggy batter.
-
Customize Flavors: Feel free to switch the dragon fruit with other fruits, like strawberries or raspberries, for a delightful twist on this Pink Dragon Fruit Layer Cake!
Pink Dragon Fruit Layer Cake Recipe FAQs
When is my dragon fruit ripe?
Look for a dragon fruit that has bright, even color with just a few little wrinkles. If it’s too green or has dark spots all over, it’s best to pass. A ripe dragon fruit should feel slightly soft when gently squeezed, like a ripe avocado!
How should I store my Pink Dragon Fruit Layer Cake?
Store your Pink Dragon Fruit Layer Cake in an airtight container in the refrigerator for up to 3 days. This keeps it moist and flavorful. When you’re ready to serve, let it sit out at room temperature for about 30 minutes to soften, especially if frosted.
Can I freeze leftover cake?
Absolutely! To freeze your Pink Dragon Fruit Layer Cake, wrap it tightly in plastic wrap and aluminum foil. This protects it from freezer burn and the cake will stay fresh for up to 3 months. When you’re ready to indulge, just thaw it overnight in the fridge and bring it back to room temperature before serving.
What if my frosting is too runny?
If your frosting ends up too runny, add a bit more heavy cream and beat until smooth. Alternatively, sift in a little powdered sugar to thicken it up. If you need it to be fluffier, whip it longer, as the air that gets incorporated can help improve the consistency.
Can I make this recipe nut-free?
Of course! This Pink Dragon Fruit Layer Cake is naturally nut-free as long as you use a gluten-free flour blend that doesn’t contain nuts. Always check your flour ingredients to ensure there are no nut-based components, ensuring a safe dessert for all your guests.
Is this cake suitable for pets?
It’s best not to share cake—especially one that contains sugar and other ingredients—with your pets. Even though dragon fruit itself is safe for pets in small amounts, the sugar in cake isn’t ideal for their diet. Save those delightful creations for human consumption!

Pink Dragon Fruit Layer Cake: A Joyful Gluten-Free Delight
Ingredients
Equipment
Method
- Begin by gathering all necessary tools like mixing bowls, measuring cups, cake pans, and a mixer.
- In a large mixing bowl, whisk together the all-purpose flour, granulated sugar, and any other dry flavorings you desire.
- In a separate bowl, beat the unsalted butter and sugar until light and fluffy.
- Incorporate the eggs one at a time, blending well after each addition along with the vanilla extract.
- Gently fold in the pureed dragon fruit and milk into the batter until just combined.
- Divide the batter evenly between prepared cake pans and bake in a preheated oven at 350°F for 20-25 minutes.
- While the cakes cool, whip the heavy cream with dragon fruit puree until smooth.
- Once the cakes are completely cool, layer them with frosting in between each cake.
- Finish with additional frosting on top and some fresh fruit toppings for an extra burst of color!


